LUVTruck.com

phpBBV3 Message Board
It is currently Tue May 07, 2024 12:36 pm

All times are UTC - 6 hours


Post new topic Reply to topic  [ 57 posts ]  Go to page Previous  1, 2, 3  Next
Author Message
PostPosted: Sat Feb 08, 2014 8:48 pm 
Offline
Senior Member

Joined: Sun Jul 07, 2013 6:46 pm
Posts: 80
Location: Castaic, Ca
All right! Got the old motor out (see the classified section if interested) and pressure washed and scuffed the engine bay. Tomorrow it will get a good couple coats of primer and paint. The I will test fit the motor and see how e everything is going to fit. See what I can keep and see what I can get rid of.ImageImage
ImageImage

Anyone Have a/c? With a swap? What about the battery tray? Should I dice it and relocate the battery? Any suggestions would be much appreciated.

_________________
Fortune favors the well prepared!


Top
 Profile  
Reply with quote  
PostPosted: Sat Feb 08, 2014 9:33 pm 
Offline
Addicted to LUV
User avatar

Joined: Thu Feb 25, 2010 11:52 am
Posts: 1124
Location: Hot Springs AR
That cleaned up nice but I bet it was a lot of work. I am getting ready to move my battery to the bed. I just want it out of the way under the hood.

_________________
Image

Three Amigos


Top
 Profile  
Reply with quote  
PostPosted: Sat Feb 08, 2014 10:16 pm 
Offline
Addicted to LUV
User avatar

Joined: Thu Jan 21, 2010 11:47 pm
Posts: 2944
Location: Vancouver, Washington
That looks a heck of a lot like mine. White truck blue bay.
I ground the welds off and took my tray out. Going to the bed behind passenger side of the cab any extra space is always welcome

_________________
Luvless :(
1980 Mikado-Sold.

1993 Lexus SC400 my Daily
2004 Yamaha WR250F my new love in life
2016 Toyota Camry my girls ride


Top
 Profile  
Reply with quote  
PostPosted: Sat Feb 08, 2014 11:07 pm 
Offline
Addicted to LUV
User avatar

Joined: Sun Jan 22, 2006 1:11 am
Posts: 2803
Location: Baytown,Texas
I came within a couple of brackets of A/C in the white 79' Mikado . It sold before i could finish it . New owner ripped all the A/C stuff and even the heater stuff out of the truck . Probably have to move the dryer a bit if you mount the alt on the driver side . And the Battary tray will more than likely have to go for compressor room . I have done V8 with factory battary tray though, just not with air . I would suggest removal and cleaning of evaporator unit . Also replacing the expansion valve now with 134A compatable . I think they are like $14 new .


Top
 Profile  
Reply with quote  
PostPosted: Sun Feb 09, 2014 10:26 am 
Offline
Senior Member

Joined: Sun Jul 07, 2013 6:46 pm
Posts: 80
Location: Castaic, Ca
love4theluv wrote:
That looks a heck of a lot like mine. White truck blue bay.
I ground the welds off and took my tray out. Going to the bed behind passenger side of the cab any extra space is always welcome


How funny. I like the white paint. I'm gonna follow through into the engine bay.

_________________
Fortune favors the well prepared!


Top
 Profile  
Reply with quote  
PostPosted: Sun Feb 09, 2014 4:56 pm 
Offline
Senior Member

Joined: Sun Jul 07, 2013 6:46 pm
Posts: 80
Location: Castaic, Ca
Got some duplicolor on the frame. Now to mask off and get the rest done! Then retape the wiring harness. Any who has done a swap that kept the brake? How did you do it? Thanks!!
Image

Image
Image

_________________
Fortune favors the well prepared!


Top
 Profile  
Reply with quote  
PostPosted: Sun Feb 09, 2014 5:29 pm 
Offline
Addicted to LUV
User avatar

Joined: Sun Jan 22, 2006 1:11 am
Posts: 2803
Location: Baytown,Texas
The e brake ? If so yes . You have to move the pulley similar to the Hooker diagram , but as much as possible


Top
 Profile  
Reply with quote  
PostPosted: Sun Feb 09, 2014 7:27 pm 
Offline
Senior Member

Joined: Sun Jul 07, 2013 6:46 pm
Posts: 80
Location: Castaic, Ca
Taped off and eching primer, CHECK!
Image
Image
Image
Image

_________________
Fortune favors the well prepared!


Top
 Profile  
Reply with quote  
PostPosted: Sun Feb 09, 2014 8:15 pm 
Offline
Senior Member

Joined: Sun Jul 07, 2013 6:46 pm
Posts: 80
Location: Castaic, Ca
First coat of paint. Man what a difference.
Image
Image
Image

_________________
Fortune favors the well prepared!


Top
 Profile  
Reply with quote  
PostPosted: Sun Feb 09, 2014 8:24 pm 
Offline
Addicted to LUV
User avatar

Joined: Thu Jan 21, 2010 11:47 pm
Posts: 2944
Location: Vancouver, Washington
Heck yeah man lookin good!

_________________
Luvless :(
1980 Mikado-Sold.

1993 Lexus SC400 my Daily
2004 Yamaha WR250F my new love in life
2016 Toyota Camry my girls ride


Top
 Profile  
Reply with quote  
PostPosted: Sun Feb 09, 2014 11:50 pm 
Offline
Addicted to LUV
User avatar

Joined: Sat May 11, 2002 3:47 pm
Posts: 3469
Location: Sand Bernardino, CA
:ebiggrin


Top
 Profile  
Reply with quote  
PostPosted: Mon Feb 24, 2014 11:41 am 
Offline
Senior Member

Joined: Sun Jul 07, 2013 6:46 pm
Posts: 80
Location: Castaic, Ca
So I've made some good progress. There is a lot to do on a swap llike this. I have a ton of pictures. The motor is in and running. I'm at the driveshaft shop right now waiting for them to open. So far all of the things I've done:
1. Custom motor mounts.
2. Custom tranny mount.
3. S10 header modification.
4. Custom hydraulic clutch line and adapters.
5. Custom mods on gear shifter.
6. Tranny tunnel mods.
7. Custom fuel pump setup.
8. Custom (I had to machine the crank pull to work) March vbelt pulleys.
9. Electric pusher radiator fan.
10. Custom e-brake mods.
11. Frame mods for the new exhaust.
12. Brake and fuel line relocations.
13. Electric choke.
14. Custom starter, ignition, and fuel relays with additional wiring to take the load off the starter switch.
15. Custom additional fuse box.
16. Steering shaft mods to fit the headers.
17. Custom alternator brackets.

I know there a a couple of other things I did and I will post the update pics soon. Anybody taking this on better have a lot of time on there hands and must be fairly knowledgeable about how to fabricate. This swap, although easy for experienced mech's, is relatively expensive and difficult. I hate to discourage but I think I need to be fair to some of the inexperienced starters. You really need to have the tools and be prepared to spend at least 3k. I have more around 6 in mine but I went all out race with the engine.

_________________
Fortune favors the well prepared!


Top
 Profile  
Reply with quote  
PostPosted: Mon Feb 24, 2014 3:52 pm 
Offline
Addicted to LUV
User avatar

Joined: Thu Jan 21, 2010 11:47 pm
Posts: 2944
Location: Vancouver, Washington
Lom sounds just like what im in the middle of. Im in pretty much the same place you are in my build, waiting on the driveline from the shop
What did you do for the additional fuse box? I got one out of a jeep xj with relays and fuses

_________________
Luvless :(
1980 Mikado-Sold.

1993 Lexus SC400 my Daily
2004 Yamaha WR250F my new love in life
2016 Toyota Camry my girls ride


Top
 Profile  
Reply with quote  
PostPosted: Mon Feb 24, 2014 7:12 pm 
Offline
Senior Member

Joined: Sun Jul 07, 2013 6:46 pm
Posts: 80
Location: Castaic, Ca
love4theluv wrote:
Lom sounds just like what im in the middle of. Im in pretty much the same place you are in my build, waiting on the driveline from the shop
What did you do for the additional fuse box? I got one out of a jeep xj with relays and fuses


I just bought a little four unit from pep boys. There was one on ebay from buick that had enough relays ( i wanted some extra capacity for other "accessories") but I wasn't sure at the time.

_________________
Fortune favors the well prepared!


Top
 Profile  
Reply with quote  
PostPosted: Mon Feb 24, 2014 7:56 pm 
Offline
Senior Member

Joined: Sun Jul 07, 2013 6:46 pm
Posts: 80
Location: Castaic, Ca
I am only going to post some of the more specific pictures but you can check out all 100 of them so far on photo bucket.

While I pulled the old motor out and had a nice clean canvas to work with I went ahead and planned out all of the accessory locations and started to replace and add additional wiring.

Image

I then added some heavier gauge wiring to the fuse box and the alternator to allow for an alternator upgrade later. This is sow wire which is MTW, machine tool wire, and that means it has a lot of strands (flexibly) and a highly oil resistant jacket.

Image

Since the starter on a 74 is on the drivers side I had to relocate the starter wire within the existing loom to the passenger fender where I installed a starter relay and ignition relay. This is the fuel pump relay on the drivers side. The other relays are in similar location.

Image

Image

Image

Image


Once I had the wiring pretty much tied together it was time to test fit. It was tight. I even had to turn the thing side ways because my leveler wouldn't tilt far enough.

Image

That's when I discovered the motor mount problem.

Image

Image

_________________
Fortune favors the well prepared!


Top
 Profile  
Reply with quote  
PostPosted: Mon Feb 24, 2014 8:08 pm 
Offline
Senior Member

Joined: Sun Jul 07, 2013 6:46 pm
Posts: 80
Location: Castaic, Ca
The stand off that the through bolt was too high. Plus the angle at which the motor was at was wrong. It need to tilt down a little so the carb surface on the manifold was level. This added a complicated angle to the through bolt. But after measuring again and again I got the second set right.

Image

Image

Once I got the motor mount right it was time to go to town on the tranny mount. I though I took a pic of that but I guess not. I'll post again later. The mount was easy

Image
Pretty much made a piece with some angle iron and a section of radiator hose(for vibration)mounted to the stock holes.

Wheeww! Motor is in and mounted solid with poly mounts from energy suspension. Now we have to tackle all the systems. The first thing I tackled was the e-brake. I love the stock brake handle and really wanted to retain it. I was determined.

Image

Image
I didn't want to destroy the original brakectry and cables so I modified it with this and just bent the bracket a bit. No cutting ( except where I mounted a smaller wheel @ tha fire wall. Home depot has some rellly good rope pulleys that I snatched the wheel out of. I bought 2 of them and used one for the wheel and one for below to pull the bottom cable out of the way of the exhaust. I mounted it to the frame right where it goes from the firewall to the floor board. It works great!!

Once the e-brake was done I was cool. I could take my time and finish the rest in my sleep (Yeah right!!). Once the brake was done I was dead set on finishing the wiring to get it to run.

Image

The old coil from the original luv motor with a custom bracket


Image


The new msd coil.

Image

_________________
Fortune favors the well prepared!


Top
 Profile  
Reply with quote  
PostPosted: Mon Feb 24, 2014 8:36 pm 
Offline
Senior Member

Joined: Sun Jul 07, 2013 6:46 pm
Posts: 80
Location: Castaic, Ca
I don't want to jump around too much but before I get to far I want to make sure I show all the grounding. The way DC voltage works (for those of us who aren't electrically inclined) is that electrons flow from negative to positive. Some european cars use and ungrounded negative and land the positive wire to the frame, body, and panels. Domestic cars use the negative as a ground. A lot of older vehicles use the frame and body as a source for ground. By that I mean that they pick up the negative from a nearby stud or bolt. or ground strap. So if you don't have a good ground on all the "isolated" parts on the vehicle. That means pretty much anything that is not welded together and on rubber isolators needs to be grounded. I still have three more straps to install just to get a ground loop. All of the mounting points should be a bolted connection. No tek screws or self tapper with a course thread. More importantly is that the course thread relies on the integrity of the thread, in this case one single thread. With a bolt and nut or with a flush threaded insert ( these are all over the frame and body) then you have four to seven threads (fine or course threaded). Plus with a washer they spread the load on the sheet metal better and it doesn't tend to come loose. Man they really made these trucks pretty well for what they were.


Image
Coming down the edge of the battery tray. I routed it out of site for a clean look.
Image

Even the relay picks up the negative from the fender. This is the innermost screw for the regulator.
Image

Ok so now the motor is wired up and ready to go! Ohh snap! Forgot the stupid fuses for the new fuse block and it's 9:05. Parts store is closed. I go to CVS and in the automotive section they had one pack of fuses with everything I need. A 25 for fuel pump, 20 for the starter, and 15 for the ignition. Ha! I came back and she fire right up!

No fuses!
Image

Ready, set, fire!
Image

_________________
Fortune favors the well prepared!


Top
 Profile  
Reply with quote  
PostPosted: Mon Feb 24, 2014 9:13 pm 
Offline
Senior Member

Joined: Sun Jul 07, 2013 6:46 pm
Posts: 80
Location: Castaic, Ca
Sweet!!
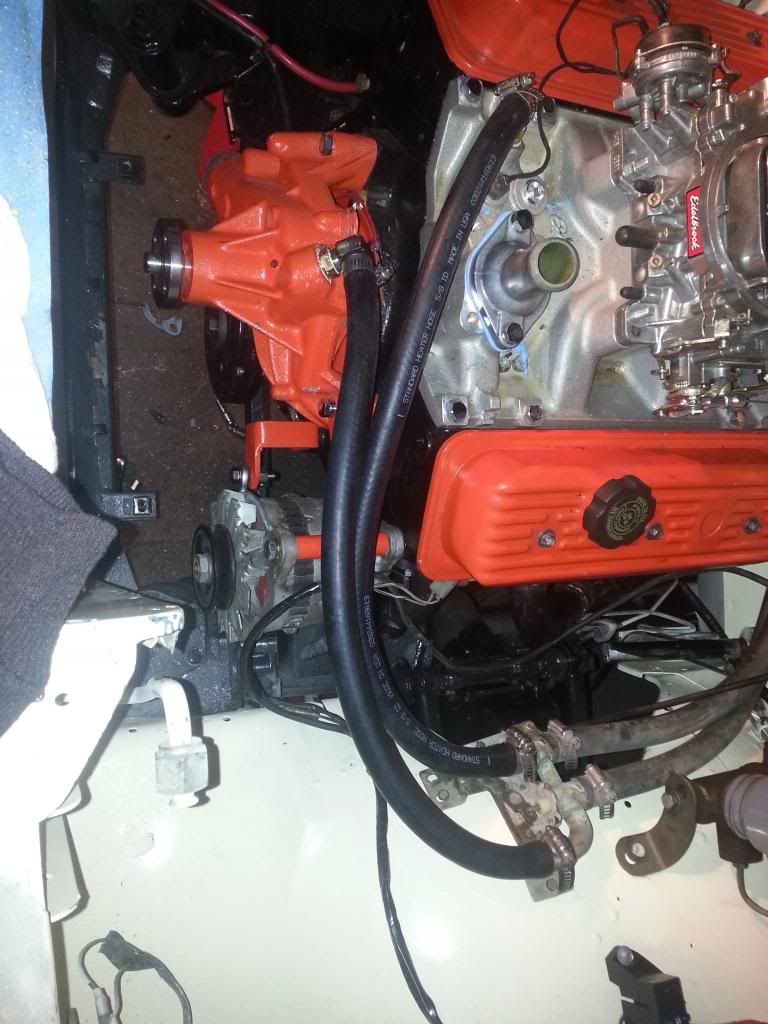
Now it's just finish the remaining 15 items. First the alternator.
Image

Image

Image

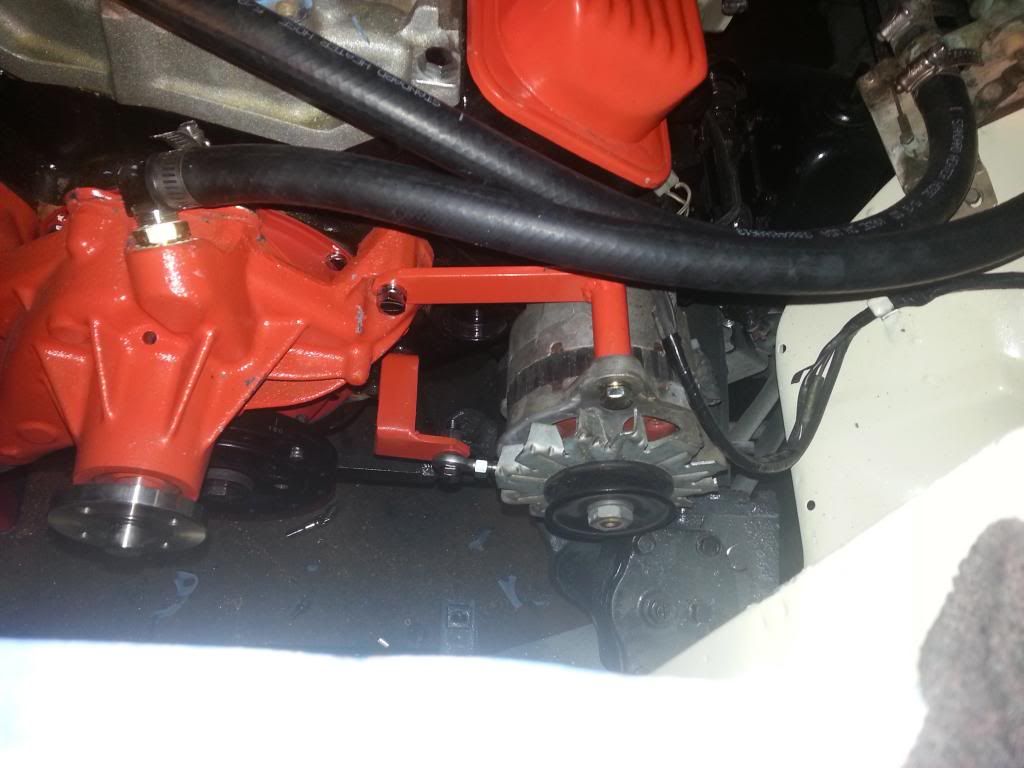
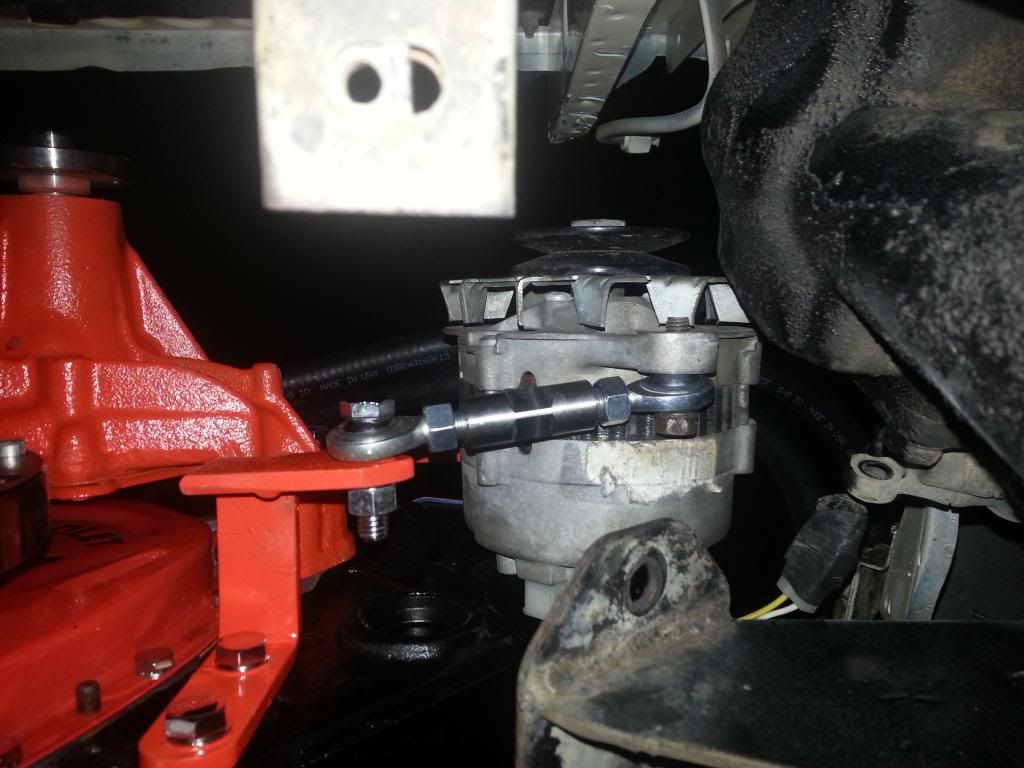
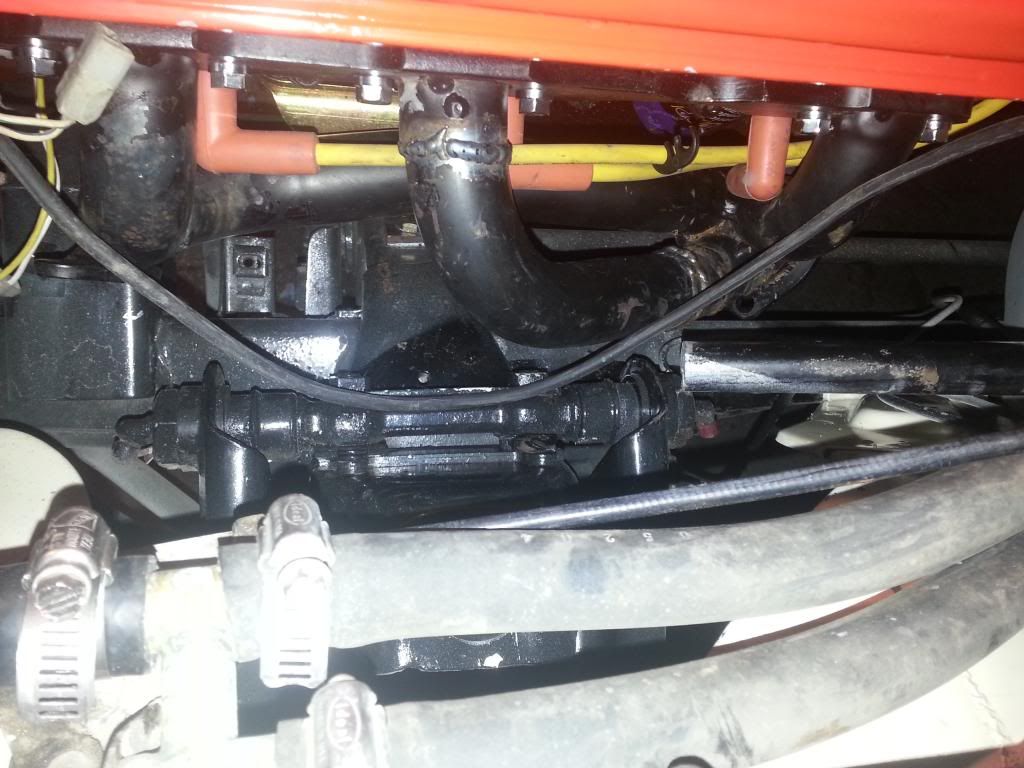
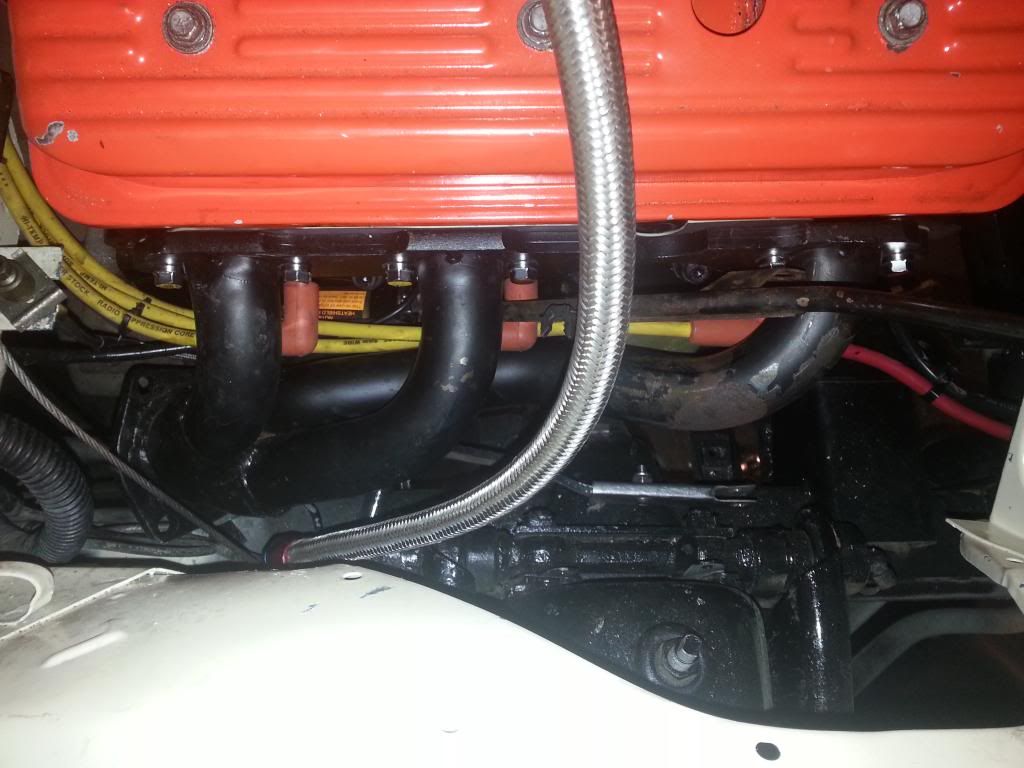
Got that done now modify the header for the steering shaft. I cut the shaft in half above where the hoop was on the header. I ordered a coupler that won't be here until wednesday so I made a temporary one out of a large rod coupling and put four stainless steel set screws in it with dimples on the shaft. Works good for a temp. Ran the steering through 6 or 7 no rolling cycles with no slippage.

Image

This side is cool. Just remove the smog stuff that comes on the S-10.

Image

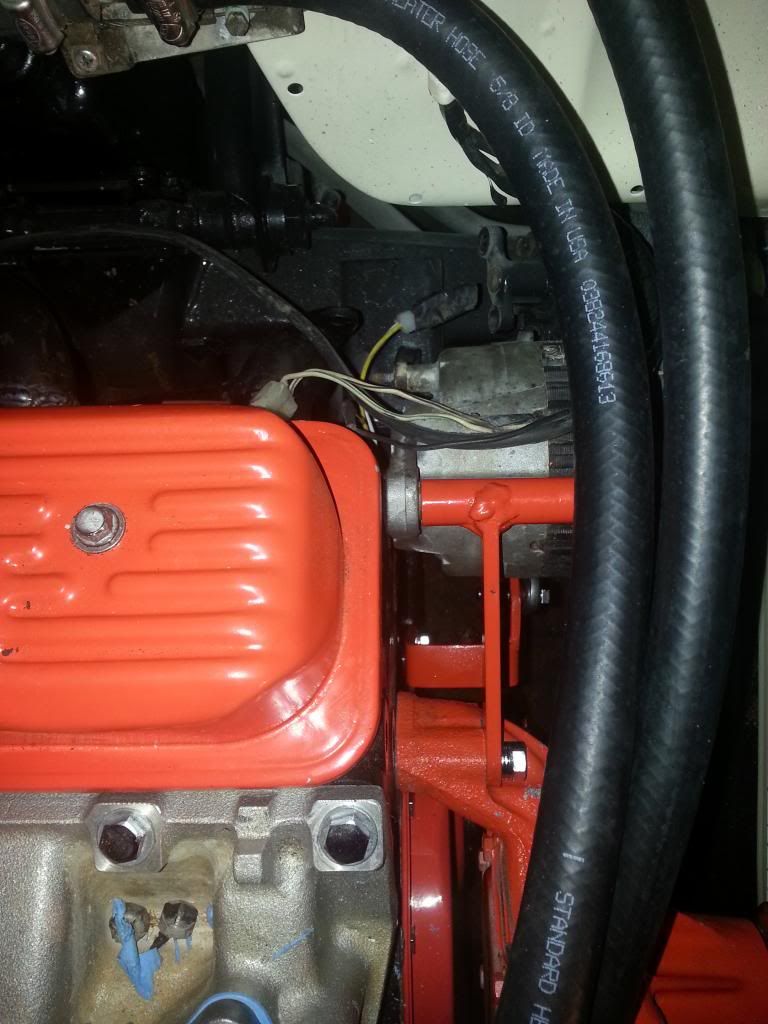
Then finished the heater hoses. It's hard to see but I put chrome 90° hose adapters on the pump and manifold.

Image

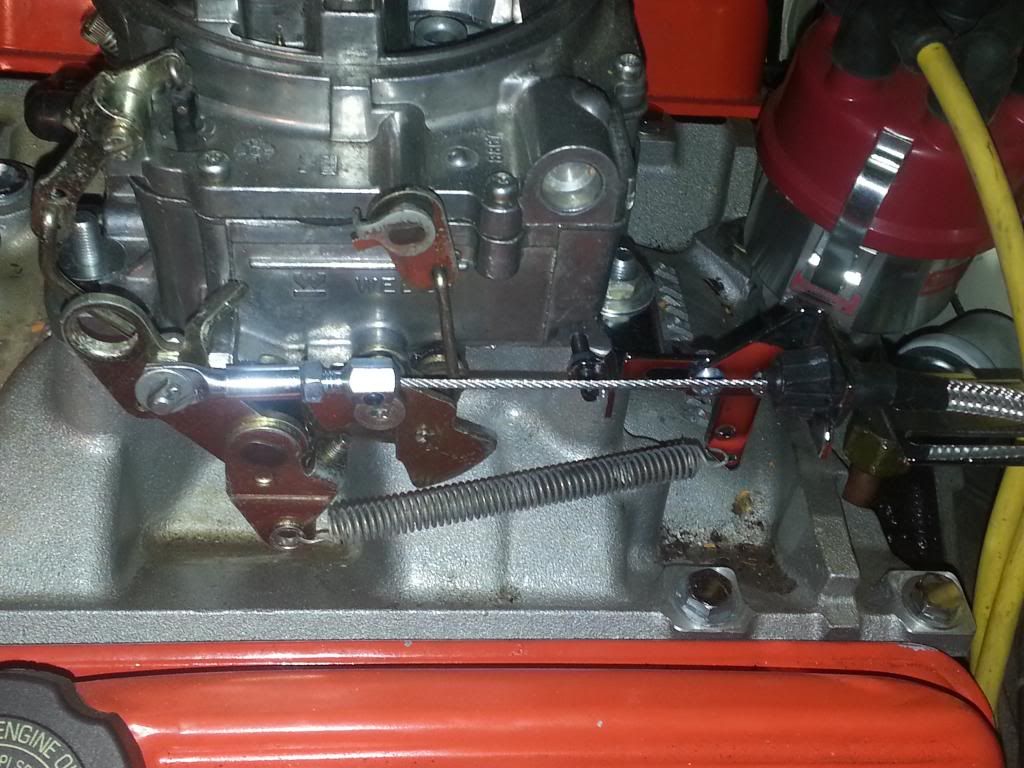
Then the throttle cable. I bought the one that pep boys had, a spectra, and it actually pretty nice. It was like 26 bucks. All I had to really do was get a clean bracket for the carb and cut the old cable flush with the nut that screws in the fire wall. I drilled and tapped it (it actually really hard plastic) for the new cable threaded end and screwed it right to the firewall like factory.

Image

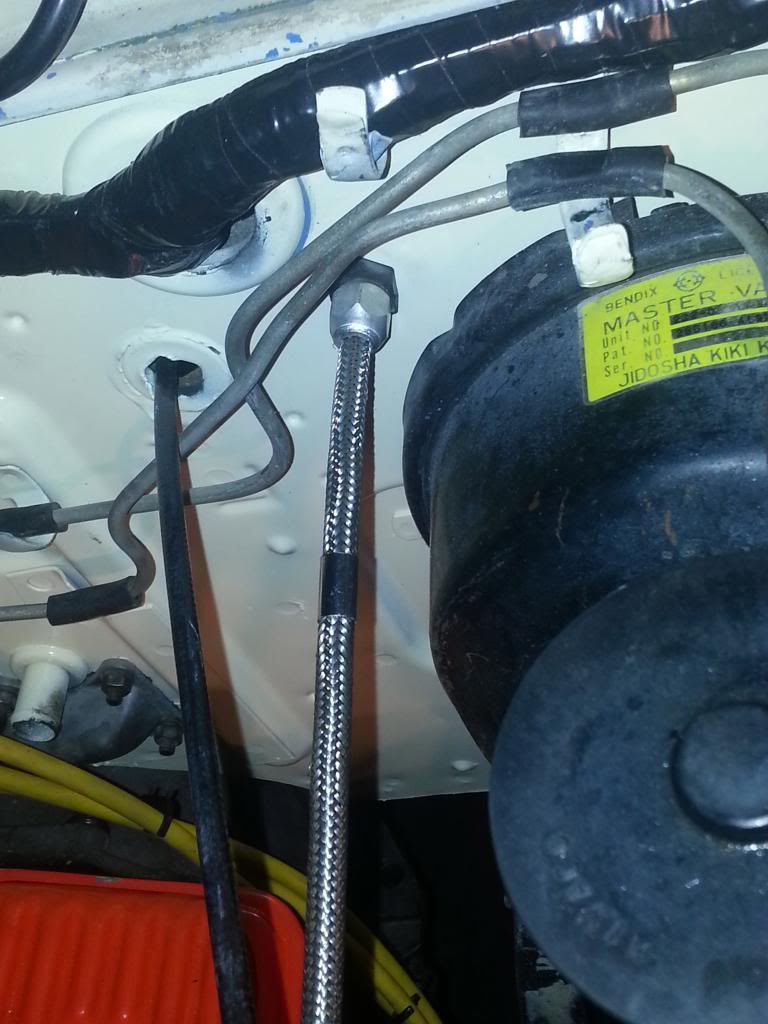
Then I drilled a hole in the ball end and ground it so it would the spectra provided cable end. The bracket was a spectra too from summit.

Image

Alright. This is going quick and easy, Until.........


Image


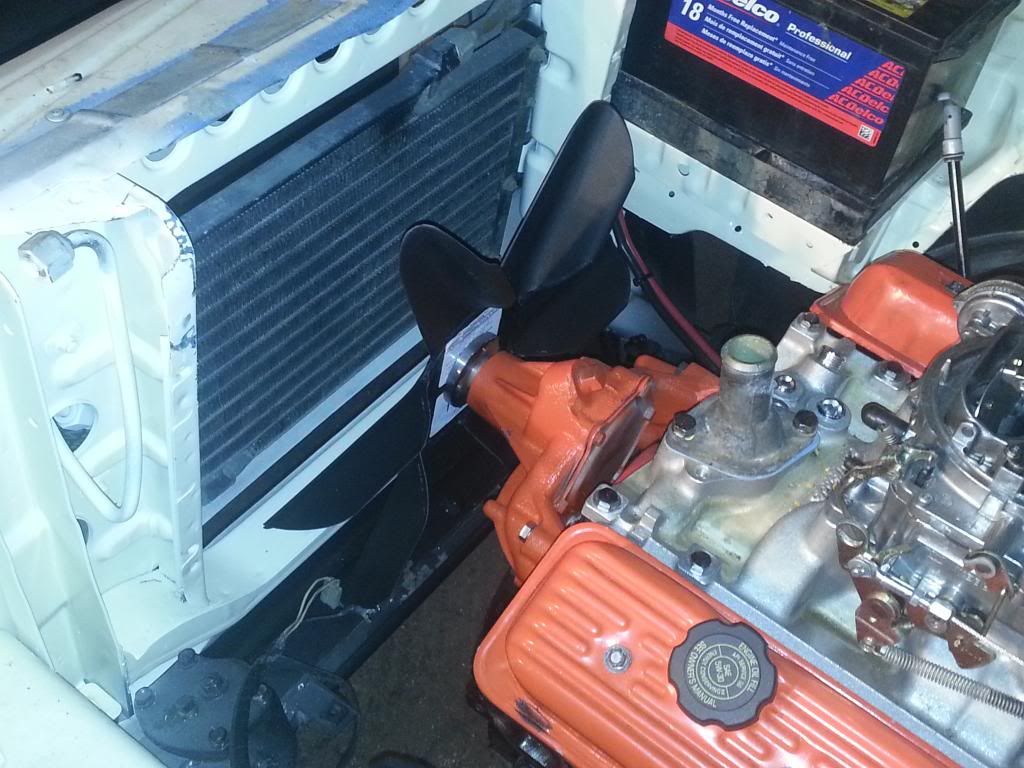
I put the fan on and discovered 2 or three more problems to be solved. The fan I bought was way to big at 18". Thought a smaller fan would work until I measured it. Nope. Problem was that the fan blade was hitting the lower radiator outlet. I would ha need a 13" fan to clear. Another 100 bucks!! Electric fan. It will be a pusher that fits on the front. Crap!! Then I try to bolt up the V-belt pulleys I bought from March. Waterpump check! Alternator check! Main pulley crap!! The main pulley on the "vortech" motors, post 84', have a small pilot on the back of the pulley to locate it on the damper concentrically. The "other" small blocks have a large pilot. Not to big of a deal. I knock off the pilot on a mill and run it just with the bolts. Nope. now it is also sitting 5/16 to far forward. I can't find a serpentine that will work beside the stock one and there is no way i'm putting huge acc drive in this truck. I want it clean so I stay with the v-belt. Took it to a machine shop today and he's going to cut it down from the side so I retain the flange or backing. I'll take it over to a welder and have him weld the flange back in. To make sure it's true I'll have it set up in a jig so he can tack it real good then remove the jig to finish weld it. Add another piece in the pilot hole and true it up raised 3/16 so it can be cleaned up. Take it back to the machinist to surface it and cut in the small pilot and viola!! A new piece is born. Yeah another 200 into the 250 dollar pulleys. And I will still have to polish it myself. Man this is a lot of work.


I

_________________
Fortune favors the well prepared!


Top
 Profile  
Reply with quote  
PostPosted: Mon Feb 24, 2014 9:46 pm 
Offline
Senior Member

Joined: Sun Jul 07, 2013 6:46 pm
Posts: 80
Location: Castaic, Ca
Cool so now lets get down with the shifter.


When I put it in I could barely put it in neutral. The stock NV3500 stick was just to high. The cover and mount was fine but the stick came up from the base to high
Image

So I cut an angle out of the shaft and rewelded it.
Image

After that I bent the stock stick with a conduit bender. Put it all on and shifted great. I am even thinking of shortening the shaft and setting it up as a short shifter with my drifter ale shift handle.
Image


I did have to cut the hole hole out a bit so the shifter base would fit and allow the transmission to come out easily later. Gonna add a removable piece later.
Image

Then I got to the clutch. I used the stock master and bought the earlier NV3500 slave which actually was for an sm465 (I think the number is right?)and had to tap the aluminum body from a 1/4 inverted flare to a 1/4 not and used an adapter from 1/4 not to a -3 line. I made an adapter from the original body mount hose end the stock rubber hose had and put an 1/8 th not thread on that. Bought a 20" braided line with 2 female -3 ends and put it all back in the stock location.

Image

All of this happened over The last 2 weeks. Not to bad. With any luck I'll be driving it with the wife on date night! I took it to midas for the 2.5" exhaust. I had cut the cross members similar to Lov4theLuv's but I crossed over between the end of the tranny and the next crossmember. I added a total of 4 pieces of schedule 40 pipe to the two cross members. I set it up so right after the the second crossmember I could add an X pipe there right before the flow masters. It should be done tomorrow. I am also having a driveshaft made. It is going to be set up for a ford nine down the road. I am going to make an adapter to go from the stock isuzu flange to a 1310 narrow flange. It will bolt right to a nine later. The driveshaft will be ready on wednesday and the adapter?? I am going to focus on the lower pulley for the next 2 days and get the damn thing belted hosed. The lower radiator hose is a pain too. The upper is fine it's the lower going from 1-1/4 to a 1-3/4 all in six inches length and a 90° to boot. I'll post some mor pics of the exhaust and routing better pics on the slave cylinder and anything else you might have a question about.

_________________
Fortune favors the well prepared!


Top
 Profile  
Reply with quote  
PostPosted: Mon Feb 24, 2014 10:40 pm 
Offline
Addicted to LUV
User avatar

Joined: Thu Feb 25, 2010 11:52 am
Posts: 1124
Location: Hot Springs AR
Nice, that is a whole lot of work in a short time. Now the fun starts. 8)

_________________
Image

Three Amigos


Top
 Profile  
Reply with quote  
Display posts from previous:  Sort by  
Post new topic Reply to topic  [ 57 posts ]  Go to page Previous  1, 2, 3  Next

All times are UTC - 6 hours


Who is online

Users browsing this forum: No registered users and 8 guests


You cannot post new topics in this forum
You cannot reply to topics in this forum
You cannot edit your posts in this forum
You cannot delete your posts in this forum
You cannot post attachments in this forum

Search for:
Jump to:  
Powered by phpBB® Forum Software © phpBB Group