Hope I'm not hijacking this thread...
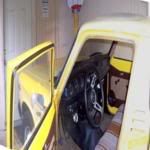
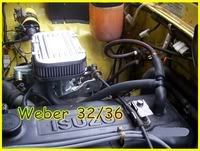
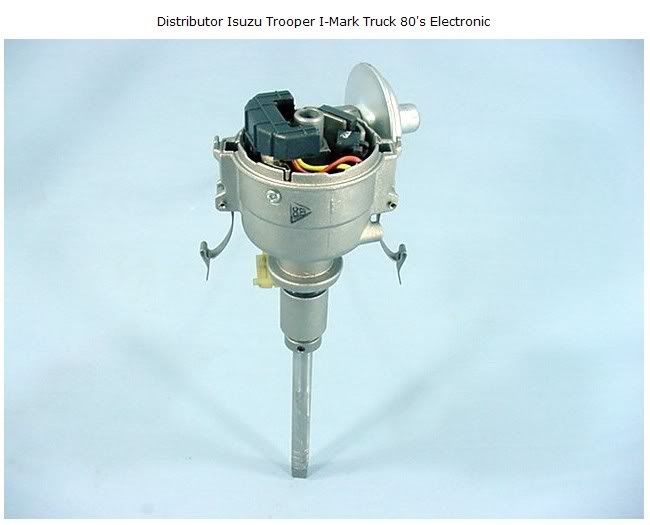
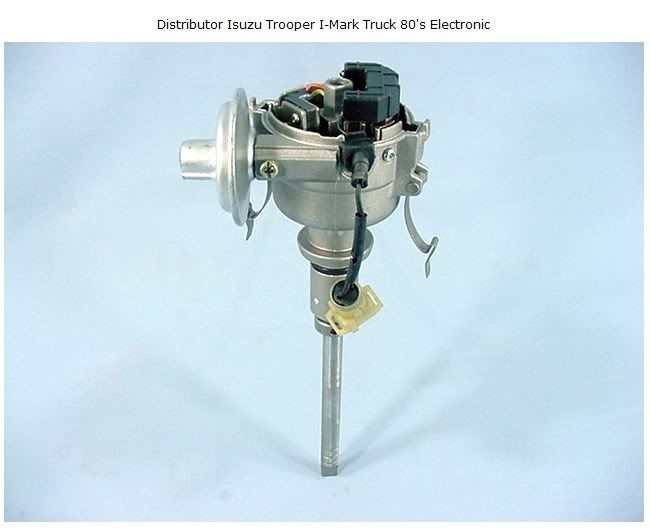
Here are some photos of the same model dizzy I just put in my truck. Pulled from an '85 Isuzu 1.9. It was way easier than I imagined.
I had a Pertonix on my old Rambler 196, but it was a painful experience to install and get a coil that would work with it properly. There just wasn't enough room to get the wiring installed correctly, and I HATE pulling points knowing that I might have to reinstall, regap and redwell them.
This, however, is a ONE bolt, ONE wire exchange, plus the distributor itself. So, if it doesn't work, you can just crimp an eyelet to the negative lead and drop your old one back in.
Here's directions (let me know if I left something out):
1. Remove the negative coil lead on the distributor body.
2. Snip the fork off the end, and crimp on a male spade.
3. Crimp an eyelet that will fit on the coil secondary post on the end of a 14-20" piece of 12/14 gauge wire, and a male spade on the other end.
4. Roll the fan until the engine is at TDC. Remove the coil to distributor lead at the distributor (The one in the middle of the cap, same gauge as a plug wire). Pull the distributor cap to make sure the rotor is pointing in the general direction of the #1 plug lead. Tuck the cap up and away from the work area, no need to disconnect the wiring just yet.
5. Mark the body of the distributor in relation to the block AND the rotor in relation to the distributor shell (just in case you have to put it back).
6. Pull the distributor bolt and hold down, pull the vacuum advance hose, remove the distributor.
7. Put the new rotor on the electronic distributor, orient it closely to the way the old one came out, and slide it in. Make sure the blade end engaged properly by slightly twisting the rotor. If it won't seat all the way into the block, wiggle the rotor until it drops in. Put the distributor hold down back on, and bolt it down, but leave it loose enough to be able to move the distributor without breaking stuff. Reconnect the vacuum advance hose (or plug it until you've set the timing).
8. Place the spade of your new (red?) wire from the + side of the coil in the slot with the black wire with a yellow/orange stripe.
9. Place the spade from the old distributor (- side of coil) in the other slot.
10. Remove the battery cable or whatever you feel is safe at this point.
11. Disconnect the wiring to the + side of the coil, slip your new (red?) wire eyelet on, and put it back together.
12. Put your new cap on, and move the plug wires from the old cap to the new. Don't forget the coil wire.
13. Start your truck.
14. Adjust the timing as needed. Tighten down the distributor hold down, reconnect the vacuum advance.
That's it, feel free to GRIN like crazy when you're done. I know I did.
On a side note: ctmandu and I have the same style distributor, and there was some discussion about the ballast resistor on the coil. He left it connected, as did I. He's had his in for a year or so, with no apparent problems, and mine does not seem any hotter than it did before the swap.
Sorry if this is juvenile stuff for some of you guys, I was terrified to actually do this. When I finished, I was amazed. So, on to my photos...
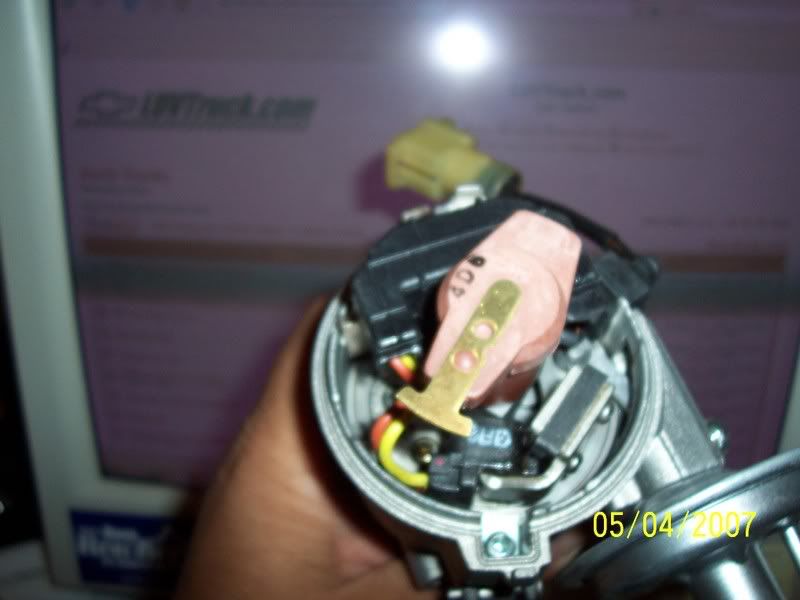
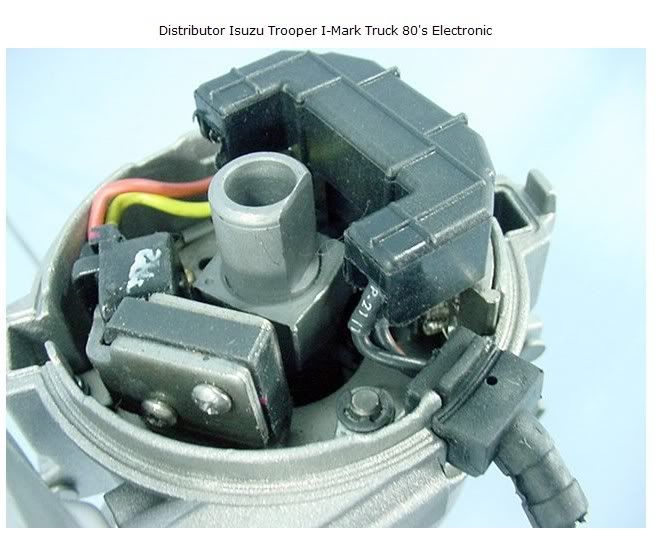
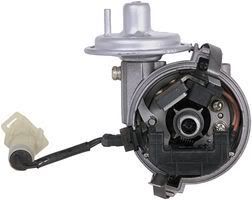
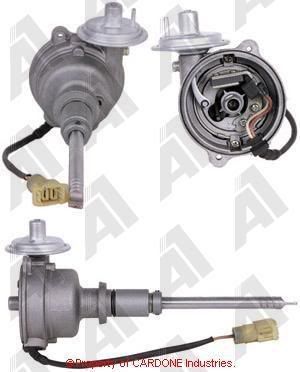
It looks like the trigger is slightly different in these photos, although they both claim to be the same PN. Mine has the more square trigger, as opposed to the spoke style in the first photo (and the NAPA pic).
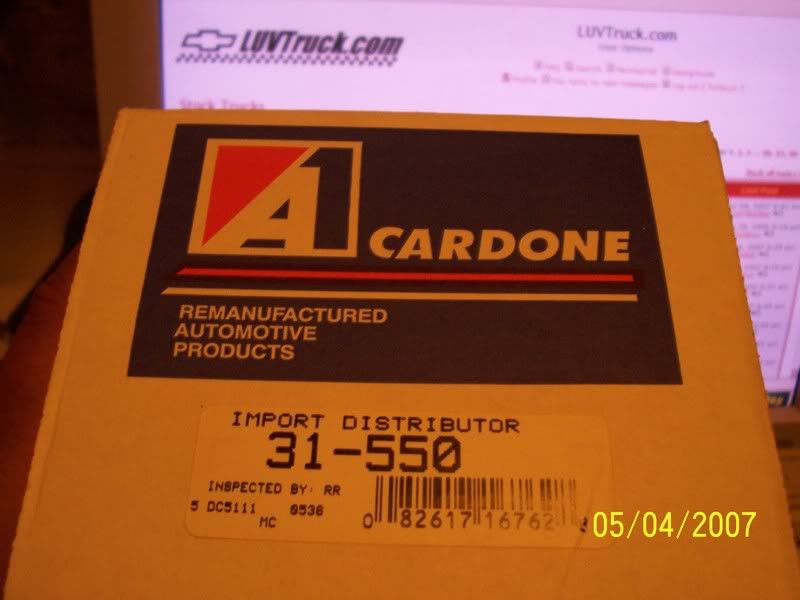
A-1 CARDONE Part # 31550 (
'85 Isuzu P'up)
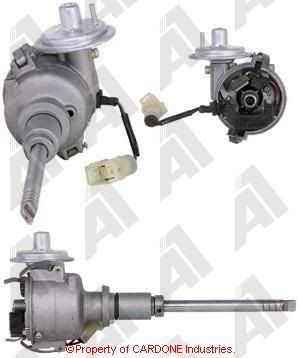
 NAPA PN: NRD48550
I posted the PN for the cap and rotor in another thread, but here are the Bosch PN's for those:
Cap 03188
Rotor 04081
Why just swap the points, when for a little extra (or less, used) you can change the whole dizzy? There's a reman for sale now on ebay buy-it-now for $120 including shipping. I've bought stuff from fruitridge in the past, and have received excellent products and service.
http://cgi.ebay.com/ebaymotors/Distribu ... dZViewItem
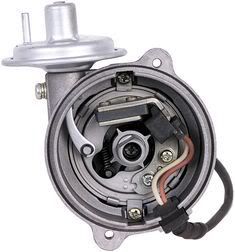
This next one is also a stock unit, and looks to me like it would need an external ignitor of some sort. It looks like this is just the Hall effect pickup added where the points used to go.
A-1 CARDONE Part # 31628 ('82 Luv)
 NAPA PN: NRD48628
This hopefully will give everyone an idea of what to keep an eye out for in the yards, or online