LUVTruck.com

phpBBV3 Message Board
It is currently Thu Apr 25, 2024 2:30 pm

All times are UTC - 6 hours


Post new topic Reply to topic  [ 27 posts ]  Go to page 1, 2  Next
Author Message
PostPosted: Sat Sep 10, 2011 12:47 am 
Offline
Senior Member

Joined: Fri Sep 09, 2011 10:18 am
Posts: 57
For the past two months, I've found myself content traveling exclusively by fixed gear road bike. That was until I purchased my first LUV, Chevy LUV that is.

I should ask my friend the detailed story one more time, just to know for myself, but this LUV was stashed in a field for a while, till he was asked to help revive it. The owners lost interest and gave it to him and a clutch slave cylinder and some carburetor adjustments later, he had a running driving car!!! Things have changed in his life, and he got a newer car and wanted to part with this one. I spent the last week searching for Volvo after Volvo and nobody seemed to want to make a deal...until I got a text, out of the blue, from my friend, giving me first dibs on his '75 Chevy LUV.

I didn't hesitate...I'll take it...NOW!!! So after class, last night, he picked me up and drove me to it's resting place in Sonoma. A quick walk-around in the dark and I was hooked...got in and drove her home, but not before a quick stop to the gas station to clear off the windscreen; the tank was half full so I cruised.

A little rough around the edges, well yeah, maybe, but it's a solid, running, driving, SMUG Exempt Chevy LUV.

I couldn't be more excited!!!

I drove it to work today, and in my downtime, I managed to wire in the tachometer that was hanging on the steering column. The car's wiring is a mess, but I'll get to that...it runs and drives, which is important, but no interior lights work, nor do the wipers and I need to wire in my stereo. I swept out the bed, got some cool license plate frames from my friends at the Volvo shop, properly fit the Mexican seat blanket, which came with the truck, and sealed the 9/32" hole that had been drilled in the roof...so I've got no leaks to worry about. When I got home, I gave her a bath and she's slowly starting to shine. :D

I'm surprised with just how well it actually drives...It's got manual steering and it feels, well, not tight, but it's responsive and has a good weight to it. The truck feels very well balanced and nimble...which I did not expect at all! The motor, too, has well, enough power for now. It's by no means fast, but not the most anemic thing I've driven either. The first couple things I'd like to do is the late model front disc brake upgrade, with some stainless steel lines, and I'd like to find a set of Bilstein HD shocks to replace what's on there now...I've just got to start measuring shocks to find a set that'll fit. I've got to spend some time, reseaching options and sources for replacement bushings, as most, if not all are cracked and look pretty well shot.

It's my first Pick-Up Truck and Carbureted car, all in one!!!

So, meet my new ride, Donata (came with personal plates, so it's adopted the name)

Image

Image

Image

Image

Image

Image

Image

Image

Image

Image

Image


Top
 Profile  
Reply with quote  
PostPosted: Sat Sep 10, 2011 2:36 am 
Offline
Senior Member

Joined: Wed Mar 16, 2011 12:40 am
Posts: 87
Looks good could b lower lol

_________________
Image


Top
 Profile  
Reply with quote  
PostPosted: Sat Sep 10, 2011 10:44 am 
Offline
Jedi Pimp Master

Joined: Sun Aug 14, 2011 11:30 am
Posts: 272
Dang it! Ya need a yellow door man!

SRAD

_________________
My Wife is faster than you think you are


Top
 Profile  
Reply with quote  
PostPosted: Sat Sep 10, 2011 11:02 am 
Offline
Senior Member

Joined: Fri Sep 09, 2011 10:18 am
Posts: 57
LILLUV wrote:
Looks good could b lower lol


HellaFlush. :lol:

Like in your sig.


SRADkneedragger wrote:
Dang it! Ya need a yellow door man!

SRAD


I know...keep an eye out for me. There are about a half-dozen LUV trucks scattered in the Nor-Cal Pick-N-Pulls...I think I'll go tomorrow and see what I can fill the bed with.

:ebiggrin


Top
 Profile  
Reply with quote  
PostPosted: Sun Sep 11, 2011 1:52 am 
Offline
Senior Member

Joined: Fri Sep 09, 2011 10:18 am
Posts: 57
So it looks like Donata and I are off to a LUVing start. :lol:

I made my first use of having a truck bed, by taking my housemate down to the market, for some essentials. We left with $80 worth of beer and a 15lb of dog food. :ebiggrin

We drove her home, turned around at the top of the hill and, on the descent down to my house, a house away from mine, the headlights went out.

What luck, for the lights to go out right in front of my house and not leaving me stranded somewhere...that's the kind of LUV that lasting relationships are built on! We made loading up the fridge a priority, as well as feeding my dog....then out to the street to determine the status of the headlights.

It didn't take long before I saw the entire wiring harness...man this car is simple!!! I followed the leads, from the switch to the bulbs and couldn't find anything...no relays and the fuses were all, well, not blown.

Jiggled the connections at the fuse panel and, wouldn't you know it, I have lights!!!

In the process, the dash gauge lights finally decided to start working. So the end result is I still have headlights and I've got the added luxury of dash lights!!! Everyday, this car gets a little better and a little better!!!

Well, she didn't leave me stranded, and she's in better shape than when I got her! Off to bed for now, but I'm off to the JY tomorrow to see what I can score for my new LUV.


Top
 Profile  
Reply with quote  
PostPosted: Sun Sep 11, 2011 8:37 am 
Offline
Addicted to LUV

Joined: Sun Jun 06, 2004 11:48 pm
Posts: 6353
Location: Whittier, (So). Cal.
The fuse blocks are notorious for rusting up and creating all kinds of electrical problems. Take it apart as much as possible and clean it all up.

_________________
OK, I'm over it. Where's the beer? 8)


Top
 Profile  
Reply with quote  
PostPosted: Sun Sep 11, 2011 9:33 am 
Offline
Senior Member

Joined: Fri Sep 09, 2011 10:18 am
Posts: 57
rondog wrote:
The fuse blocks are notorious for rusting up and creating all kinds of electrical problems. Take it apart as much as possible and clean it all up.


I've gotta do that and tighten up the blade terminals.

It's a pretty rust free, clean car...Thanks CA...but the female blade connectors have loosened up. I've got a tool for that. :D


Top
 Profile  
Reply with quote  
PostPosted: Sun Sep 11, 2011 10:50 pm 
Offline
Senior Member

Joined: Fri Sep 09, 2011 10:18 am
Posts: 57
Image

Drove to the JY for some parts...paid $20 for a bunch of small, spare stuff like lights and switches. Going back tomorrow to take care of the important stuff!


Top
 Profile  
Reply with quote  
PostPosted: Mon Sep 12, 2011 9:33 pm 
Offline
Member

Joined: Tue Aug 30, 2011 6:19 pm
Posts: 45
Location: Trinidad Colorado
love the mexican blanket! i gotta get one of those! to cover the gapping holes in the seat... but in all seriousness the truck looks steller!


Top
 Profile  
Reply with quote  
PostPosted: Mon Sep 12, 2011 9:45 pm 
Offline
Senior Member

Joined: Fri Sep 09, 2011 10:18 am
Posts: 57
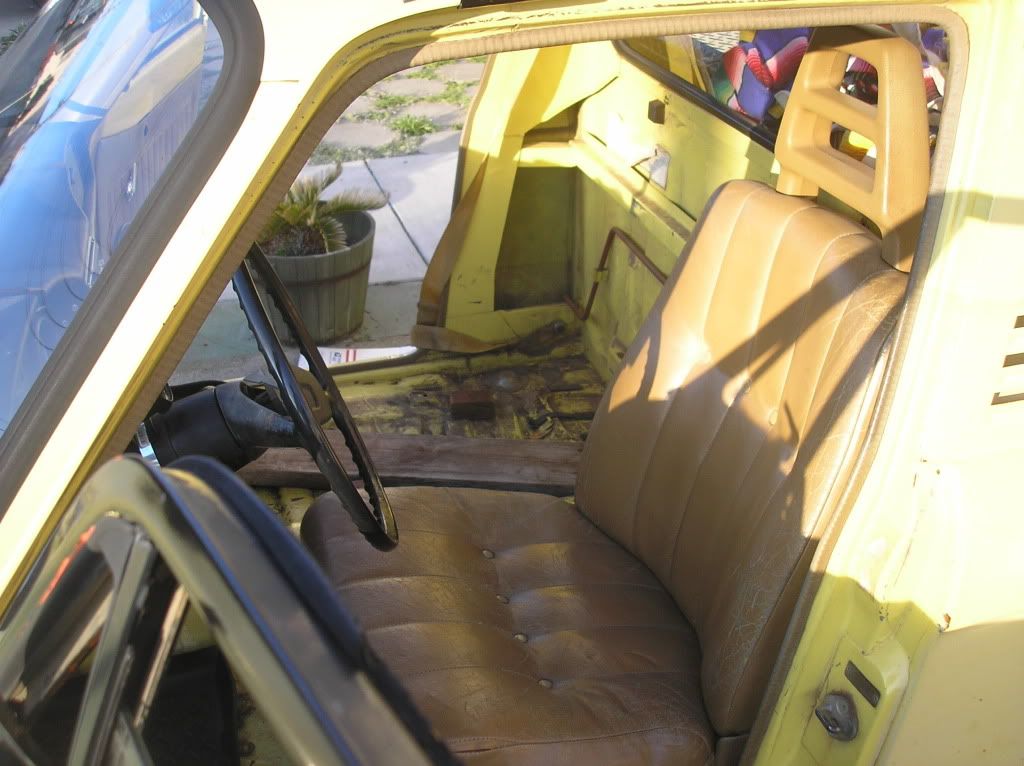
I'm certainly feelin' the LUV!

Made a trip back up to PnP, which was rather unsuccessful.

I made it home and got the title transferred over to my name, yay!!!!!! It's an extra $50 per year to keep those personalized plates, so I sacrificed them and was issued a brand new pair of plates.

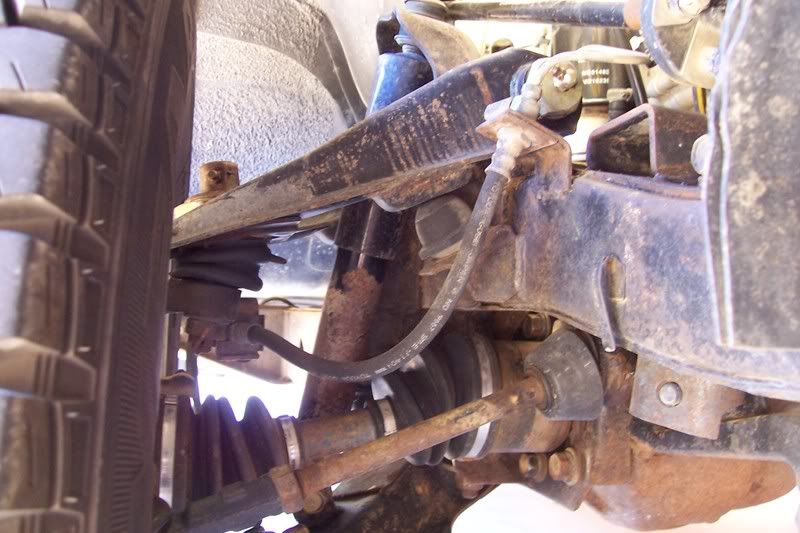
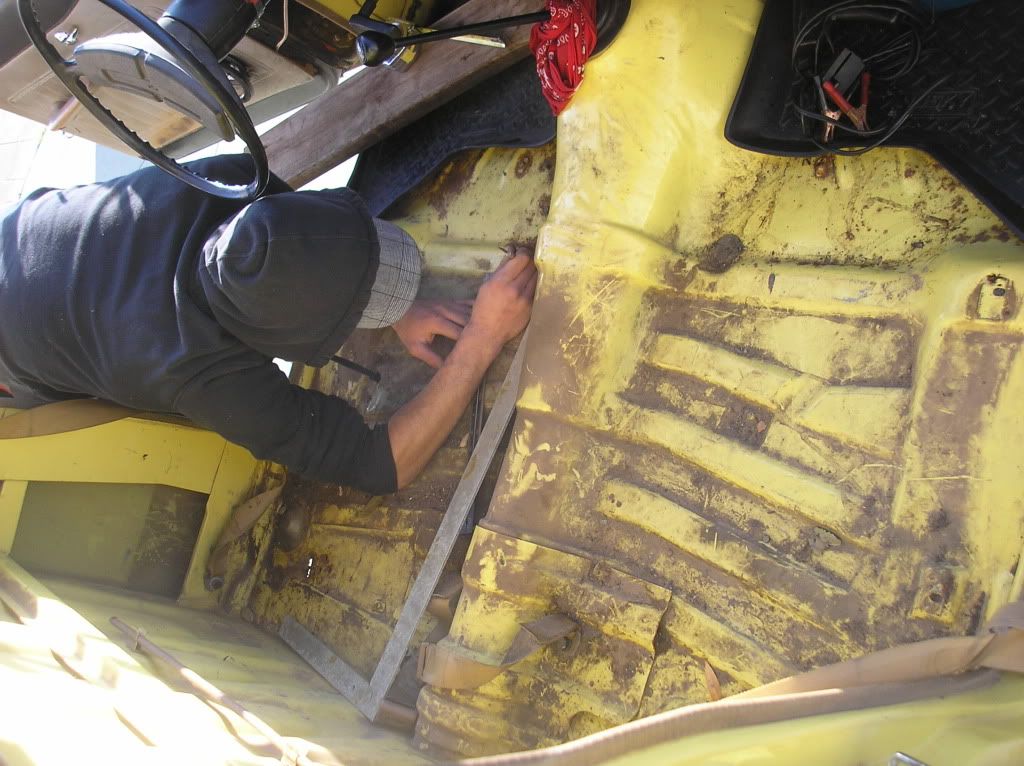
The remainder of the afternoon, I spent with the air cleaner off the carburetor, trying to make sense of the old SMUG pump system and replace whatever worn vacuum lines I could find.

I ended up replacing every vacuum line, and securing them with AWAB hose clamps, i've collected from various Volvo's. It's amazing what idle and throttle response is like, when you've got no vacuum leaks. I also found dry, cracked, ready to burst fuel lines under there, so I b-lined it to HAT Racing and got some Good-Year fuel hose and fixed it on the spot...then off to the nasty Kragen for some nice wiper blades...I got the wipers working today!...some vacuum plugs and a new fuel filter. Car runs much, MUCH better now, and I'm happy to have working wipers and constant 12v to the radio lead...they're on the same terminal on the fuse panel...which needs service too.

There's still a nasty mess of wiring under the hood, which shall be repaired soon, but first thing is to completely eliminate the SMUG pump stuff, cut out the Cat and get idle, mixture, dwell and timing set.

No substantial projects are planned for Donata Brassica, however, I've started filling a bin with parts for later and spares...

Here's what I gathered, this weekend...

Image

Inspiration for later, and maybe for when rewiring takes place. Later style LUV gauge cluster surround, for three round gauges, instead of that "artistic" thing they put in the early ones. Would you know it, Porsche 944 gauges are just about the same size, so I'm only a sheet metal backing support plate away from that going together.

Image

6500 RPM redline is more than ambitious for this current motor configuration.

Image

Gotta clean that goop off, but that's a nice way of combining idiot lights, fuel and temp gauges. I want to find a 100+mph 944 speedo to make it complete...the 944 I picked only went to 85mph. Then again, why does that matter in THIS truck?

Image

I had these sitting around, and I think they'll compliment the Porsche gauges nicely and hang below the heater console.

Image

That late model surround, all cleaned up.

Image

A not-torn shift boot.

Image

Spare hazard's switch and a wiper fluid pump...elemental to a system that needs to be reinstalled, before winter.

Image

Later style dash vents...why not?

Image

Wouldn't hurt to have these trim pieces and switches for spares.

Image

Spare fuses, pedal pads, door levers, side marker lights, a window crank and a few relays. Because, when you see a Chevy LUV in the yard, I'm quickly learning you grab what you can. These cars seem so baked, you can usually do so in one pocket, :rofl2:

Image

More treasures from the Volvo collection. To be used during the rewiring. I think the headlights are currently wired without a relay.


Top
 Profile  
Reply with quote  
PostPosted: Wed Oct 19, 2011 10:13 pm 
Offline
Senior Member

Joined: Fri Sep 09, 2011 10:18 am
Posts: 57
Couldn't live with a nasty air leak!

The stock Hitachi carburetor had a lot of play in the throttle shaft and exposed & exaggerated the symptoms of a horrific air leak. It'd fight cold starts, hesitate off the line and occasionally miss, or hesitate while driving.

Manned up and got a brand new Redline-Weber 38 DGES kit and it solved all my problems, while giving me a new toy to play with.

Again, this is my first experience with carburetors; the Weber is really fun to play with...only a few settings and adjustments and it really is "Back to Basics."

It took me till today to figure out how to properly adjust the pair of Idle Mixture screws, which helped, as I had them about a full rotation away from one another...now they're set even. Then I made some adjustments to the throttle cable attachment plate, and it feels a whole lot better.

Silly though, I can't get the electric choke to function on it's own...provided, I've got the filter off, it's no trouble to manually engage it and it'll work, but when I need it, it doesn't work. I've got it 12v and it grounds fine, so what's up???


Top
 Profile  
Reply with quote  
PostPosted: Mon Oct 24, 2011 12:34 am 
Offline
Senior Member

Joined: Fri Sep 09, 2011 10:18 am
Posts: 57
You wanted pics...well, I forgot to take one of the engine bay, with the new carburetor.

My bud and I spent part of the afternoon at Lemons Car at Infineon today. We took a break and continued north to the Windsor PnP...there's a '74 Chevy LUV that got dropped there on the 18th, so we thought we'd find some stuff.

It was the decked out Makado edition...which should mean nothing beyond having an even weirder interior. There wasn't much other than some good corner lights, a fuse panel cover and the front parking lights...so we got what we needed and moved along. Headed down to the euro section and hunted the w123 benz's for good 5.75" amber fogs...found one good set and a bunch of spare bulbs. Also scored one good Hella H4 5.75 headlight lens and bulb...the rest were all sealed beam. Made out well at the counter and got the Sunday Evening bro deal!

Installed the lighting in the lot...right next to a beautiful early 245 Turbo.

Car rides way, WAY better with full suspension travel...even handles better too!

Lighting is awesome, with a dual filiment on the outside as the lo-and-hi...got the w123 amber fog as the low when the outside hi comes on, and wired the rally driving lights into a separate switch on the dash...thats a lotta light....might want to add my rectangular post mount Bosch fogs under the bumper though, we'll see.

Carb adjustments seem to have helped, and I learned my choke isn't broken ....still gotta adjust that properly, but at least it works now.

On the '74 we picked, I observed slightly different vacuum routing....my car came with some extra SMUG equiptment, and had a vacuum solenoid regulating the dizzy...well, at least altering it via a 3rd gear switch...so vacuum advance would be different in 3rd and 4th. All the smog equiptment had been removed from my car...less this solenoid, though it hadn't been hooked up. The 74 lacked the solenoid and had vacuum straight from the carb to the dizzy. I made the routing adjustments in the parking lot and the car runs and revs much happier now!


After the pictures, we installed the good front parking light lenses...looking better!

Did you ever think I'd have a vehicle with this much ground clearance?

Image

Rallie Lights!

Image

Image


Top
 Profile  
Reply with quote  
PostPosted: Mon Oct 24, 2011 10:42 pm 
Offline
Senior Member

Joined: Fri Sep 09, 2011 10:18 am
Posts: 57
LUV is in the air....

Image


Made my way to Ken's today, for some assistance and supervision while I bled the brakes on the truck. 30+ year old brake fluid sure is funky...

Check out the one cleaned reservoir vs the one yet to be addressed...

Image


Brakes hardly feel any better...I guess 4-wheel drums really do SUCK! But at least, I've got some confidence in air-free lines, clean and fresh fluid, and watching all the rust and particulate escape from the bleed screws. When the time's right, I'll swap the front hubs for the later style with disc brakes, make some stainless lines and use the Trooper vented rotors.


In the mean time, check out my engine bay progress...

Image

Cleaned up a lot of the wiring, though it's not wrapped, and fitted that gucci new carb...and eliminated more SMUG components. A long way from this...

Image


Spent some more time, actually last night, on the Rallie Lighting! The Benz W123 Amber fogs are wired in...to the high beam field...so when I'm on low beam, the clear H4 and misc dual filament sealed beam are illuminated, then when you switch to high, they go high and the ambers come on for the low. I've got to add a relay or two though, as the stock LUV has no headlight relay. Installed the clean, uncracked parking light lenses and wired the Hella 500 driving lights to it's own switch, instead of driving off the headlights trigger.

Image


Cut me off, and I'll blind you from behind!

Image


The riddler at work...identifying the thread pitch for the cheapo Kragen rear axle u-bolts. I've been having some sheer strength issues with the hardware provided in that lowering kit...so I ditched the kit, though I've got no other u-bolts at this current time. I've had a few u-bolts fail, with the threads sheering right off.

Image


1/2" x 20, means a Volvo 240 lug nut will be perfect to double nut the existing hardware...after we shorten the bolts, smooth with a belt sander and chase the threads with the die.

Image


Back in bizz...

Image


Top
 Profile  
Reply with quote  
PostPosted: Tue Oct 25, 2011 10:30 pm 
Offline
da LUV masta

Joined: Wed Oct 11, 2006 8:56 pm
Posts: 426
Location: Auburn, WA
I really like the headlight/fog light set up. Nice work!

Eric Q.

_________________
'75 body with '82 diesel running gear
My build thread.


Top
 Profile  
Reply with quote  
PostPosted: Tue Nov 29, 2011 2:18 am 
Offline
Senior Member

Joined: Fri Sep 09, 2011 10:18 am
Posts: 57
Image

Went for a ride today, with sir Redwood Chair.

Image

We took his reliable vehicle, of course, and the guard dogs. Brought back a little treat...

Image

4x4 4Runner Steelies...15" x ?cm. 225/75/15 Kirkland Signature All Season tires.

Image

That's right...it's got Costco brand tires on....$40, packaged deal....not bad.

Image

Really makes it look amphibious...rides smooth and stable....way better traction than those old tractor tires that were on there before.

Image

Funny thing is though, I've got a truck, with ground clearance and suspension travel, yet I still can't leave the Louisville Slugger at home.

Thanks for the help Ken!


Top
 Profile  
Reply with quote  
PostPosted: Wed Nov 30, 2011 12:16 am 
Offline
Senior Member

Joined: Fri Sep 09, 2011 10:18 am
Posts: 57
Fine tuned the new STANCE today...

Hammering and massaging the rub spot up front wasn't working...spent some time in the garage last night, brainstorming while helping my friend install a new roof rack for the ski season, on his CR-V...

I concluded that an extra 2" would give the stance it's final touch and remedy the tire fitment issue.

It was half off on tailgate nets at Kragen today, so I got a Bully tailgate net....drilled six 9/32" holes, pressed in the same rivnuts I use on my 15g wastegate brackets, and screwed in the brackets with a nice, fine thread, stainless steel machine screw. Looks sick!!! Baja style!

As for the suspension, on the rear...I added 2" with something like this...

Image

The hardware it came with was as crappy as the stuff that came with those stupid 3" lowering blocks....so I modified the brackets by enlarging the holes, to accept the stock Isuzu hardware. The brackets I got had three sets of holes for the leaf springs, so one can adjust and add an inch as desired...I cut that section off, so it's a fixed 2" lift.

Torsion beam suspension up front, so I turned the height adjustment screws, till the front was up to match the back. Couldn't understand why it was so bouncy on the way home, till I looked and had the upper control arm resting on the external travel limiter, like in this picture (not mine, copied from LUVTruck.com)

Image

I doubt anyone makes aftermarket control arms on these, for use with a lift kit, but that also sounds pretty ridiculious. Instead, I removed the rubber, and cut out the plate it mounts to....Now I've got ample room, before the control arm hits the frame rail. Smart though, I checked and the shocks are too short for that to happen anyways, so unless I go way, WAY long travel, I've got nothing to worry about.

Ditched the front sway bar while I was under there......front end feels nice, and it's way more fun going over stuff now...like curbs, n stuff.


Top
 Profile  
Reply with quote  
PostPosted: Wed Dec 07, 2011 2:59 am 
Offline
Senior Member

Joined: Fri Sep 09, 2011 10:18 am
Posts: 57
Now with 2" lift!

Image

Image

Well, has been for a week now, but finally, pictures.

Washed it, and started with the clay bar on the front, after....I think it's going to look good.


Top
 Profile  
Reply with quote  
PostPosted: Wed Dec 07, 2011 7:56 am 
Offline
Addicted to LUV
User avatar

Joined: Thu Feb 25, 2010 11:52 am
Posts: 1124
Location: Hot Springs AR
Looking good, you'll be amazed what elbow grease can do to an old paint job. After you clay bar try a da polisher with some meguiars M105. 8)

_________________
Image

Three Amigos


Top
 Profile  
Reply with quote  
PostPosted: Wed Dec 07, 2011 1:17 pm 
Offline
Senior Member

Joined: Fri Sep 09, 2011 10:18 am
Posts: 57
LUVTRKR wrote:
Looking good, you'll be amazed what elbow grease can do to an old paint job. After you clay bar try a da polisher with some meguiars M105. 8)


Thanks! I really need to find a Jasmine Yellow driver door too...one with the early style vent window.


Top
 Profile  
Reply with quote  
PostPosted: Thu Dec 08, 2011 2:12 am 
Offline
Senior Member

Joined: Fri Sep 09, 2011 10:18 am
Posts: 57
Called in a favor to RWC...

He helped me revive a pair of old dresser drawers with some nails and gorilla glue.

Brought along an old friend...

Image

242 GLT seat, formerly in my '79 DL....thought the pair would make a nice upgrade from my smelly, torn up old bench...

Image

Measure twice....oh, and use a square, to, well...square it up!

Image

I swear this seat was meant to be in this car....only modification to the seat was to clip off the rear vertical section of the 240 sliders and drill a new mounting hole in the rear.

Image

Image

The bench was secured with two bolts at the left, and two at the right....I managed to reuse the existing holes in the cab and added only two new ones.

Image

A couple of spacers to level the seat, and there we go!

Image

Looks and feels familiar....it was just meant to be.

So there it is, one more component converted to Volvo spec.....one piece at a time, this'll slowly evolve into a Volvo, of sorts.

Now that I've got my setup down, I've just got to drill the passenger side holes and I'm golden.


Top
 Profile  
Reply with quote  
Display posts from previous:  Sort by  
Post new topic Reply to topic  [ 27 posts ]  Go to page 1, 2  Next

All times are UTC - 6 hours


Who is online

Users browsing this forum: No registered users and 4 guests


You cannot post new topics in this forum
You cannot reply to topics in this forum
You cannot edit your posts in this forum
You cannot delete your posts in this forum
You cannot post attachments in this forum

Search for:
Jump to:  
Powered by phpBB® Forum Software © phpBB Group