LUVTruck.com

phpBBV3 Message Board
It is currently Tue Apr 16, 2024 2:31 pm

All times are UTC - 6 hours


Post new topic Reply to topic  [ 41 posts ]  Go to page Previous  1, 2, 3  Next
Author Message
PostPosted: Fri Oct 02, 2009 10:22 pm 
Offline
Step-side Guru
User avatar

Joined: Sun Apr 11, 2004 11:09 pm
Posts: 5272
Location: Salem OR.
when i tried to get mine off we had a hell of a time. for one, the treads have a little grove in them if you look close and a metal wedge wedged in , so when you do eventually get the nut off it will all be ruined... any way we had a 6ft cheater bar with pipe wrench and a torch still took over 2 hrs to get one nut off and we broke the 36 inch pipe wrench doing it... if you read the dealer shop manual it will say to replace the upper A_arm and ball joint as one unit.... so my uppers have not been changed as of yet. will eventually put on the pup upper arms with the easy to change ball joints...

PS if you look at the pic of the upper ball joint you can see the groves i am talking about

_________________
My old but now gone Luv...
Image


Top
 Profile  
Reply with quote  
PostPosted: Fri Oct 02, 2009 11:30 pm 
Offline
LUVTruck.com Lifer

Joined: Wed Aug 31, 2005 12:34 pm
Posts: 799
Location: Melbourne, Australia
Thats easier, just see if you can hire/borrow a 3/4 bar off someone.


Or weld a bar to your adapter.


Bob.

_________________
Current project, 1979 KB Isuzu Ute.
Image
Daily driver, '86 Rodeo Spacecab.
Chasing parts for Isuzu Impulse.


Top
 Profile  
Reply with quote  
PostPosted: Sat Oct 03, 2009 8:46 am 
Offline
Addicted to LUV
User avatar

Joined: Wed Apr 12, 2006 2:24 pm
Posts: 2143
Location: Hermiston,Oregon
The easiest way to fix this problem is to toss the stock upper and install the Trooper uppers.

A 3/4" impact wrench would probably due the job.

_________________
1978 pro street step/side 455Buick, 4sp,4.11s, 31/18.5s


Top
 Profile  
Reply with quote  
PostPosted: Thu Jun 02, 2011 11:17 am 
Offline
lives at LUVTruck.com

Joined: Fri Apr 09, 2004 2:37 pm
Posts: 319
Location: Colorado
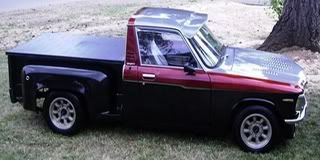
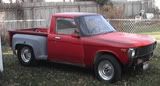
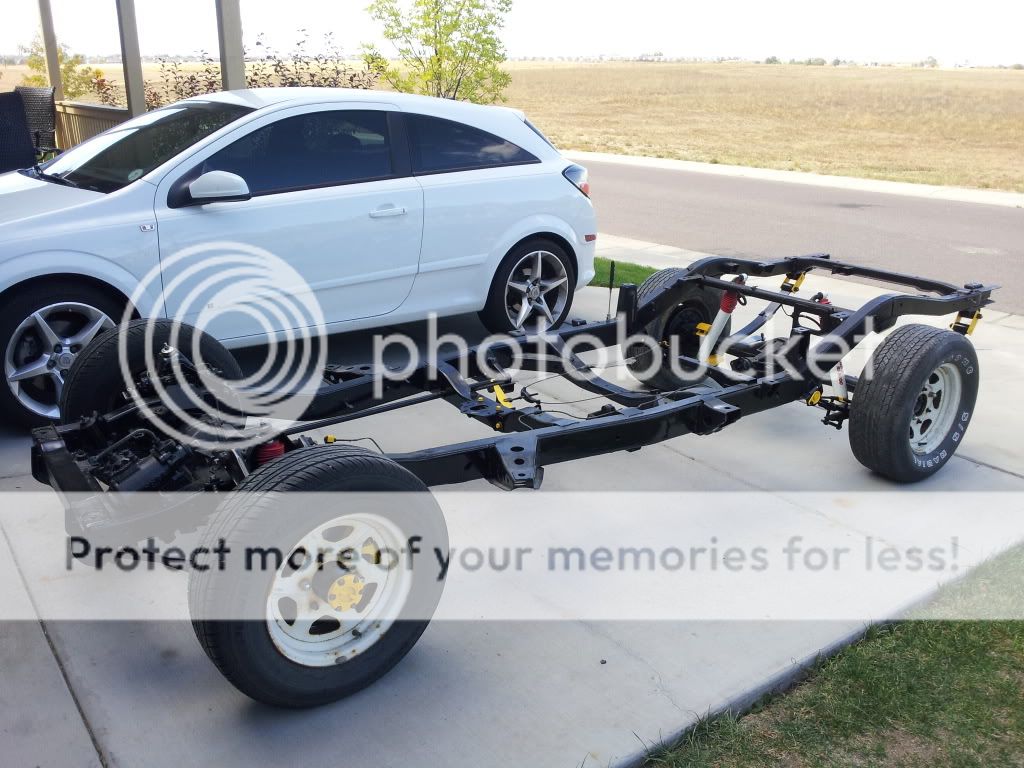
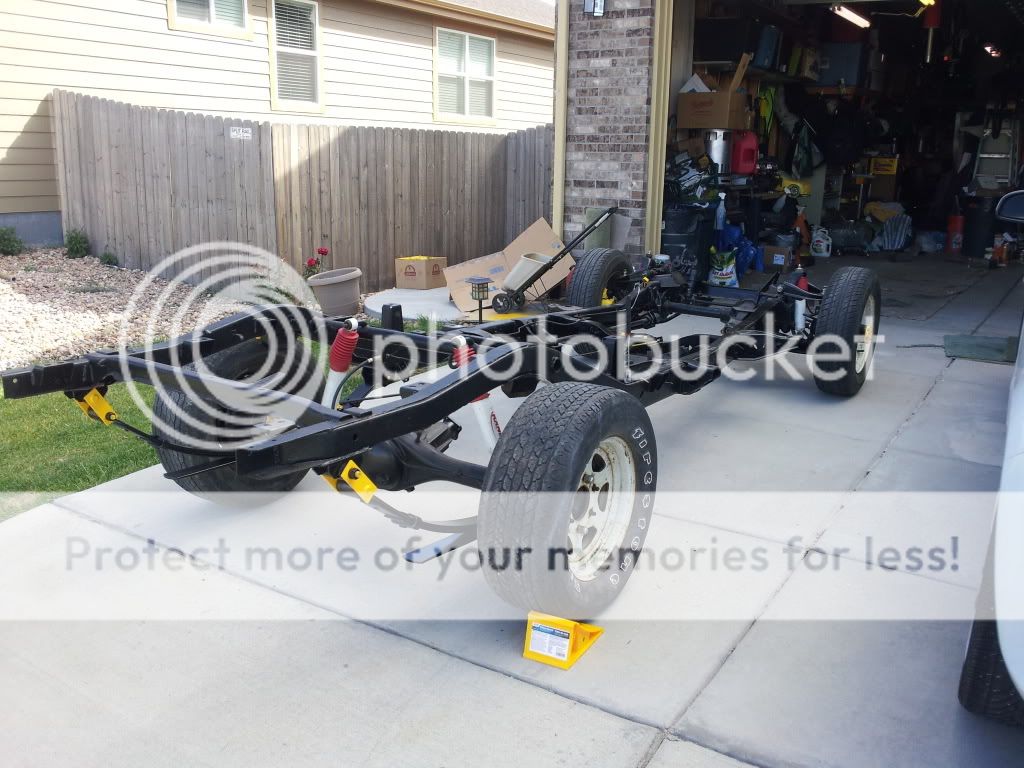
Wow, where does the time go, can't believe that it's been 2 years since I started this topic, and about that long since I actually posted anything in it. Well, don't fret, you haven't missed anything, in fact, since my last post I really haven't even worked on it. I did get it down to frame and cleaned it up, and POR-15'd the entire thing. The rebuild has been slow but I've finally gotten some motivation and desire back to actually work on it.

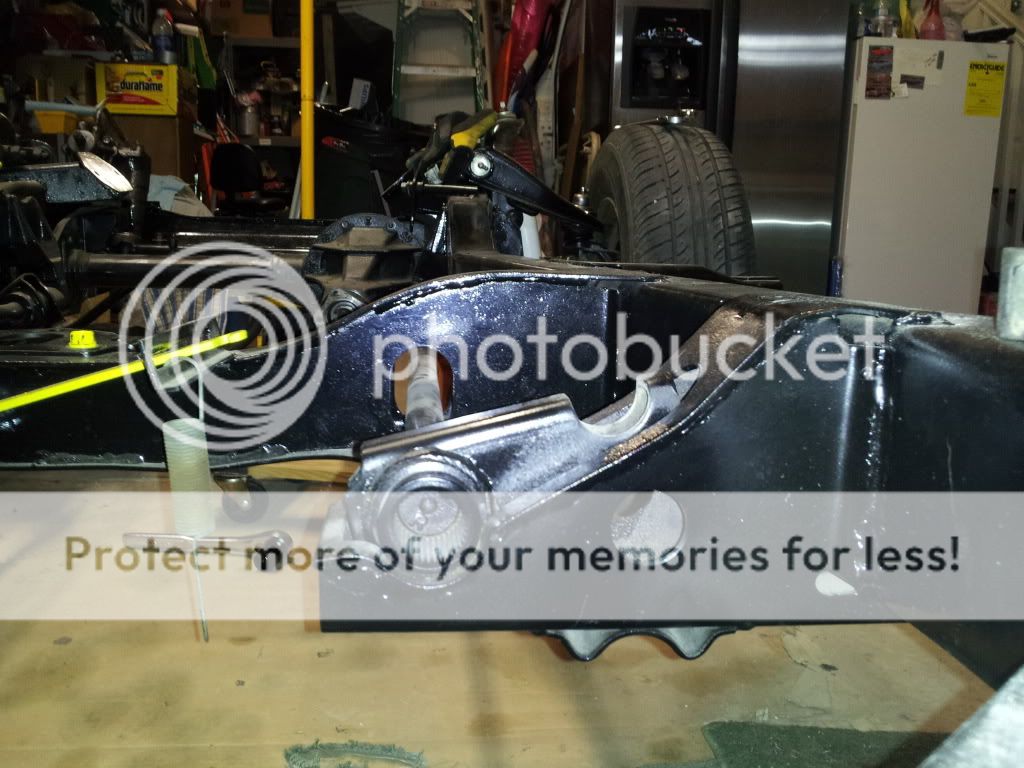
This last weekend I just about got the entire front end back together, still missing a couple things, but every night I have been able to do a little more. Spent a couple hours just hand making some gaskets for the 4wd hubs. That was an adventure, I didn't even know there were supposed to be gaskets in the hubs till I saw them in the exploded view. Good times there.

Image

One of the other things I came across, I'm putting a header on, and discovered something that now has no where to go. Do I just remove it from intake manifold and cap it?

Image

Next item, during the process of tightening one of the lower ball joints I noticed it wasn't getting tighter, just spinning. I'm guessing this is not good and that ball joint needs to be replaced (no big deal I have a couple more), but the problem is how do I get the nut off now? Since the stud spins with the nut and the nut isn't far enough on the stud to be able to hold the stud, any thoughts on how to get it off with out cutting it off?

Other than that, I'm not rushing through the process, taking my time, trying to make sure I don't forget things and do them right. So it's going to take time but hey, it's not a daily driver so I can take as much time as I need. (The wife somewhat disagrees, she would like to use the garage to actually park her car in it) I'll try to continue to update as I go, but I suck at taking pictures, honestly, I get focused in on doing the work and forget to take pictures. So what I'm going to try to do is at the end of each day I work on it, I'll try to take a few progress pics and go from there.

I guess that's it for today, I'll see ya when I see ya.

Chad

_________________
Do the day don't let the day do you!


Top
 Profile  
Reply with quote  
PostPosted: Thu Jun 02, 2011 4:36 pm 
Offline
Assimilated into LUVTruck.com

Joined: Tue Oct 07, 2008 8:07 pm
Posts: 906
Location: N W Arkansas
That tube with nowhere to go is the EGR tube. Take it out of the intake, cut in two, slide the fitting off the tube. tap the inside of the fitting for a plug (I think 1/8" pipe plug?) or bolt, thread both back into the bung on the intake. Do something similar to plug the air rail ports in the head.

_________________
'78 Chevy LUV,1.9,4sp,headers,31's,SAS Dana 30,Dana 20,SOA rear w/Aussie Locker, rough body, bought new 12/4/78.
'87 Trooper,2.3,5sp,headers,31's,ball joint flip & spacer,Aussie Locker rear,Superwinch hubs,brush guard w/5.5K winch,more to come.


Top
 Profile  
Reply with quote  
PostPosted: Sun Jun 05, 2011 3:16 am 
Offline
LUVTruck.com Guru
User avatar

Joined: Mon Jan 17, 2011 6:08 pm
Posts: 152
Location: NorthWest Washington
for my egr i did it real red neck style cut the pipe well reefed on it until it snapped closer to the rear of the engine then bent it shut with a pair of vice grips hahahaha but as for the exhaust manifold i welded a nickel over the hole that was left from the egr breaking in the first place. ill snap a pic soon when i get a header made.

_________________
1980 Chevy LUV 4x4 Weberfied Sold
1974 Chevy LUV 4x4 Weberfied


Top
 Profile  
Reply with quote  
PostPosted: Sat Oct 08, 2011 10:46 am 
Offline
lives at LUVTruck.com

Joined: Fri Apr 09, 2004 2:37 pm
Posts: 319
Location: Colorado
And I'm back with another funfilled update...First up some pics of the frame finally back to a roller. The front and rear suspension is finally all back together with one exception. Just about ready to start putting the rest of the truck back on.

So first up the frame...

Image
Image

Now the issue I've come across. After putting the front back together, I noticed that the torsion bars seemed a little off. The driver side did not release like the passenger side did when loosening them. I have the front end supported and removed the adjustment bolts completely and this is what it looks like.

Drivers Side
Image
Passenger Side
Image

If you can see it, the Driver side is raised more than the passenger side is and it makes it just a bit difficult to adust back, as passenger side I can finger tighten the adjustment bolt 10 turns, where as the driver side is tight from the very beginning. I did a trial to adjust them 15 turns and was struggling to tighten the drivers side that many turns. Once I did that I measured the distance of the front of the frame from the concrete and the passenger side was about 1/4" lower than the driver side. So...any thougths on if this is a real issue, what the issue is, or how the issue can be resolved?

And finally here is what I've been toying with for the paint scheme. I may reverse it and have the purple as the main color with a yellow stripe.
Image

As always, thank you for taking the time to stop by, and thank you for any comments or thoughts you may have.

Have a great day.

_________________
Do the day don't let the day do you!


Top
 Profile  
Reply with quote  
PostPosted: Sat Oct 08, 2011 3:30 pm 
Offline
Addicted to LUV
User avatar

Joined: Thu Jan 21, 2010 11:47 pm
Posts: 2944
Location: Vancouver, Washington
And finally here is what I've been toying with for the paint scheme. I may reverse it and have the purple as the main color with a yellow stripe.
Image

As always, thank you for taking the time to stop by, and thank you for any comments or thoughts you may have.

Have a great day.[/quote]

that is an awesome little paint scheme mock up :lol:
i wish i had one to figure mine out
i think the yellow with purple looks pretty good

_________________
Luvless :(
1980 Mikado-Sold.

1993 Lexus SC400 my Daily
2004 Yamaha WR250F my new love in life
2016 Toyota Camry my girls ride


Top
 Profile  
Reply with quote  
PostPosted: Thu Oct 20, 2011 2:54 pm 
Offline
lives at LUVTruck.com

Joined: Fri Apr 09, 2004 2:37 pm
Posts: 319
Location: Colorado
chaddmann wrote:
Now the issue I've come across. After putting the front back together, I noticed that the torsion bars seemed a little off. The driver side did not release like the passenger side did when loosening them. I have the front end supported and removed the adjustment bolts completely and this is what it looks like.

Drivers Side
Image
Passenger Side
Image

If you can see it, the Driver side is raised more than the passenger side is and it makes it just a bit difficult to adust back, as passenger side I can finger tighten the adjustment bolt 10 turns, where as the driver side is tight from the very beginning. I did a trial to adjust them 15 turns and was struggling to tighten the drivers side that many turns. Once I did that I measured the distance of the front of the frame from the concrete and the passenger side was about 1/4" lower than the driver side. So...any thougths on if this is a real issue, what the issue is, or how the issue can be resolved?


So I think what I'm going to do is take both Torsion bars out and reseat them so they are the same on both sides. Anyone see any flaws in this course of action?

_________________
Do the day don't let the day do you!


Top
 Profile  
Reply with quote  
PostPosted: Fri Oct 21, 2011 12:24 am 
Offline
Member

Joined: Sun Jan 04, 2009 5:46 am
Posts: 30
Location: Swan Valley, Western Australia
Quote:
So I think what I'm going to do is take both Torsion bars out and reseat them so they are the same on both sides. Anyone see any flaws in this course of action?


perfect.


Top
 Profile  
Reply with quote  
PostPosted: Fri Oct 21, 2011 12:53 pm 
Offline
Member

Joined: Fri Jun 03, 2011 12:26 am
Posts: 44
Location: Swansea, SC
On a side note i think thats the 1st luv model ive ever seen. Lol id buy one to build nd put on my nightstand

_________________
Danny Boy


Top
 Profile  
Reply with quote  
PostPosted: Sat Oct 22, 2011 8:50 pm 
Offline
Addicted to LUV
User avatar

Joined: Thu Jan 21, 2010 11:47 pm
Posts: 2944
Location: Vancouver, Washington
1979luvmachine wrote:
On a side note i think thats the 1st luv model ive ever seen. Lol id buy one to build nd put on my nightstand

i agree if i could get ahold of one it would be an epic collection piece

_________________
Luvless :(
1980 Mikado-Sold.

1993 Lexus SC400 my Daily
2004 Yamaha WR250F my new love in life
2016 Toyota Camry my girls ride


Top
 Profile  
Reply with quote  
PostPosted: Sat Oct 22, 2011 10:31 pm 
Offline
lives at LUVTruck.com

Joined: Fri Apr 09, 2004 2:37 pm
Posts: 319
Location: Colorado
love4theluv wrote:
1979luvmachine wrote:
On a side note i think thats the 1st luv model ive ever seen. Lol id buy one to build nd put on my nightstand

i agree if i could get ahold of one it would be an epic collection piece


Just FYI...they are on Ebay quite often. you can generally pick one up for around $20 or less. I have I think 4, all in pieces, as the ones I've bought have either been already built or partially built. Still haven't gotten a complete unbuilt one yet as those are a bit harder to come by and can go for a bit more. Just have to keep an eye out .

_________________
Do the day don't let the day do you!


Top
 Profile  
Reply with quote  
PostPosted: Sun Oct 23, 2011 10:27 am 
Offline
Addicted to LUV

Joined: Sun Jun 06, 2004 11:48 pm
Posts: 6353
Location: Whittier, (So). Cal.
If you want the truck lifted, but still have the original ride/stiffness, take the bars out, lift the frame up until the wheels float, install the bars and set it back down. Then you can crank the bars up to the level you want and the bars won't have as much tension on them then they would if you just cranked them up. We call this re-indexing the torsion bars. There is a thread about this around here somewhere.

_________________
OK, I'm over it. Where's the beer? 8)


Top
 Profile  
Reply with quote  
PostPosted: Tue Nov 15, 2011 11:06 pm 
Offline
lives at LUVTruck.com

Joined: Fri Apr 09, 2004 2:37 pm
Posts: 319
Location: Colorado
Trying to figure out how to get them out, do they go from front to back, or back to front, anybody know?

_________________
Do the day don't let the day do you!


Top
 Profile  
Reply with quote  
PostPosted: Mon Dec 19, 2011 11:15 pm 
Offline
Senior Member
User avatar

Joined: Tue Dec 13, 2011 7:14 pm
Posts: 62
Location: Pottsville, AR
I've got a trick for filling the air tube holes in the manifold. On my 80 I put spark plugs in the holes and torqued em in. Sealed em up tight as can be and I was able to eliminate the plastic tube that the previous owner had used to fix it. Had to replace that ghetto fix about every hundred miles when it burned through!!

_________________
Jim
80 LUV 4X4 Stock Drivetrain, 3" Body Lift, Shackles & Torsion Twist
99 K2500 7.4l 4l80e all stock


Top
 Profile  
Reply with quote  
PostPosted: Mon Dec 19, 2011 11:28 pm 
Offline
Addicted to LUV
User avatar

Joined: Thu Jan 21, 2010 11:47 pm
Posts: 2944
Location: Vancouver, Washington
i bought some 14mm bar and a tap. threaded it to fit. great seal with a bit of anti-seize. the total was under $10

_________________
Luvless :(
1980 Mikado-Sold.

1993 Lexus SC400 my Daily
2004 Yamaha WR250F my new love in life
2016 Toyota Camry my girls ride


Top
 Profile  
Reply with quote  
PostPosted: Wed Mar 28, 2012 11:21 am 
Offline
lives at LUVTruck.com

Joined: Fri Apr 09, 2004 2:37 pm
Posts: 319
Location: Colorado
Starting to make progress again. Front suspension is back together and complete, dropped the engine and transmission in. Getting ready to put the cab back on hopefully this weekend and can start working on the interior and wiring, then maybe get this thing fired back up and on the road by the end of the summer.

Battery Tray all cleaned and POR-15'd
Image

Engine bay painted
Image

Feels good to be making some progress, now to just keep at it and not get distracted...

_________________
Do the day don't let the day do you!


Top
 Profile  
Reply with quote  
PostPosted: Tue Nov 20, 2012 5:19 pm 
Offline
lives at LUVTruck.com

Joined: Fri Apr 09, 2004 2:37 pm
Posts: 319
Location: Colorado
It seems I'm missing one of these plugs, was wondering if anyone had one off of a parts truck they could send me?

Image

Thanks for looking.

_________________
Do the day don't let the day do you!


Top
 Profile  
Reply with quote  
PostPosted: Fri Dec 14, 2012 10:18 am 
Offline
lives at LUVTruck.com

Joined: Fri Apr 09, 2004 2:37 pm
Posts: 319
Location: Colorado
Testing some color options on the 4x4 badges, and my latest addition to the my growing fleet.

Image

Image

_________________
Do the day don't let the day do you!


Top
 Profile  
Reply with quote  
Display posts from previous:  Sort by  
Post new topic Reply to topic  [ 41 posts ]  Go to page Previous  1, 2, 3  Next

All times are UTC - 6 hours


Who is online

Users browsing this forum: No registered users and 17 guests


You cannot post new topics in this forum
You cannot reply to topics in this forum
You cannot edit your posts in this forum
You cannot delete your posts in this forum
You cannot post attachments in this forum

Search for:
Jump to:  
cron
Powered by phpBB® Forum Software © phpBB Group